Preparing Artwork and Content For Your Custom Physical Media
A Guide for Bands, Labels & Creators Ready to Press Vinyl, CDs, or Cassettes
You’ve poured time, energy, and soul into your project—and now you’re ready to bring it into the physical world. Whether you’re pressing vinyl for the first time, stocking up on CDs for your next tour, or getting nostalgic with a run of cassettes, one of the biggest keys to a successful merch run is preparation.
In this guide, we’ll walk you through what you need to have ready before you place your order. With the right materials in place, you’ll save yourself time, money, and avoid the headache of last-minute fixes and production delays.
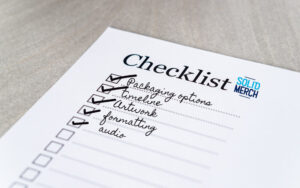
1. Know What You Want
Before diving into file formats or design templates, it helps to get a clear idea of the scope of your project. Start by answering a few essential questions:
What packaging do I want?
Each format comes with its own set of packaging options—and the more you know up front, the easier your order will be to finalize.
- Vinyl:
Your standard option is a 12″ jacket with a full-color front and back. From there, you can add extras like:- Printed inner sleeves
- Gatefold jackets
- 180g heavyweight vinyl
- Custom vinyl colors or effects
- Inserts, or download cards
- CDs:
Popular formats include:- Jewel cases (the classic look)
- Digipaks (great for eco-conscious releases or added visual impact)
- Eco-wallets (lightweight and budget-friendly)
- Each CD format can include extras like booklets, tray card printing, or CD face artwork.
- Cassettes:
These compact beauties can be customized with:- Shell colors and print
- Norelco cases with J-cards
- Full-body O-cards
- Inserts, stickers, or bonus downloads
If you’re unsure what fits your project, check out photos of similar releases or reach out—our team can walk you through the best options based on your budget and goals.
What’s my timeline?
Timelines vary depending on format, order size, and how complex the job is. If you’re planning a release show, tour, or coordinated launch date, start planning early.
- Standard vinyl production can take several weeks or more.
- CD and cassette production is typically faster but still benefits from advance planning.
- Rush options may be available, but they can cost extra—and they may still depend on you submitting everything correctly the first time.
Build in buffer time to avoid stress.
What’s my budget?
If you’re working with a tight budget, prioritize your must-haves. For example:
- You can often upgrade to colored vinyl for just a little more per unit, or consider splatter which is another cost effective option to add sizzle.
- You don’t need to go overboard on inserts—sometimes a simple handwritten note adds a personal touch fans love.
- What do my fans want? Are they looking for special packaging, or perhaps you want to promote lower cost or eco-friendly packaging.
Think about what gives you the most impact for your money, and remember—good prep = fewer last-minute changes = more control over your costs.
2. Artwork: Format It Right
Design is where a lot of projects hit snags, not because the artwork isn’t great—but because it wasn’t prepared in the correct format. Here’s what you need to know:
Vinyl, CD, and Cassette Artwork
Each format has its own layout templates, and using them is essential to ensure your designs print correctly. These templates include:
- Bleed areas (where artwork extends past the trim line)
- Safety (to keep key elements like text from being cut off)
- Areas for spines, folds, and cutouts
Depending on the product, you’ll want to prepare:
- Front and back covers
- Spine text
- Vinyl labels / CD faces / cassette shell designs
- Inserts, booklets, and download cards
All artwork should be:
- At least 300 DPI to ensure your art is printed at high resolution
- In CMYK color mode (not RGB)
- Exported as print-ready PDFs or layered files if edits might be needed
Even simple layouts benefit from being on-template. We can’t emphasize this enough: using our templates helps you avoid delays and ensures your project is printed as closely to the way you envision it as possible.
Apparel Artwork
When you’re printing on fabric, resolution matters. We strongly recommend vector files (.AI, .EPS, or print-ready .PDFs) for all apparel.
Why vector? Because these files scale infinitely without losing quality, making them perfect for screen printing, embroidery, or DTG printing. Raster files like JPEGs or PNGs can work for some methods, but only if they’re high resolution (300 DPI or more at full size).
If you’re not sure how to get your design into a vector format, we can usually help—or you can ask your designer to convert it for you.
3. Content: Ready-To-Go Audio
This one’s big. Before placing your order, make sure your audio files are finalized, labeled, and ready to go. That means no last-minute mixing or tracklist changes once the order is placed.
For CDs:
We accept both MP3 and WAV files.
- MP3s are smaller and easier to upload but are compressed, which can affect sound quality.
- WAV files are uncompressed and provide the highest fidelity—highly recommended if you care about audio quality.
Our CD content uploader accepts either .WAV or .MP3 files. .WAV files should be saved as 44.1 kHz, 16 bit, stereo files. .MP3 files should be encoded between 128 and 320 kbps with non-variable compression (VBR off). Audio files with other settings will result in order delays.
If you’re supplying a DDP file (a digital master typically prepared by your mastering engineer), we can work with that too. Just make sure everything’s labeled clearly and that the final running order is exactly how you want it.
For Vinyl & Cassettes:
Vinyl is a physical medium that needs high-resolution audio. We only accept WAV files—no MP3s, please. If you’re submitting Side A and Side B separately, label the files clearly. If it’s one long track for each side, make sure they’re trimmed and ready to go.
In addition to submitting WAV files:
- Label your files clearly (e.g., “A1 – Intro.wav,” “B3 – Closer.wav”)
- Keep track of total running time for each side
- If you’re mastering specifically for vinyl, let us know if you’ve created separate masters for Side A and B
Bonus Tips:
Include a Tracklist
A clear tracklist helps with QC, artwork layout, and labeling. Include:
- Track titles
- Correct spellings
- Timing (optional but helpful)
Review Everything Before You Submit
Before you send us your materials, do one final pass:
- Are all files labeled correctly?
- Is your artwork on the right templates?
- Are your audio files the final version?
- Are your design elements within safe zones and properly formatted?
If the answer to all of the above is yes—you’re ready to go!
Final Thought: Preparation = Peace of Mind
Solid Merch has seen thousands of successful releases go off without a hitch—and the common thread is always preparation. As we like to say, “measure twice, cut once”. When you take the time to organize your materials before ordering, you give yourself more time to focus on what matters most: connecting with your audience, promoting your release, and celebrating the fact that your music is making its way out into the world.
And remember: if you’re ever in doubt, reach out. We’re here to help every step of the way.